
AI & Software · Tutorial
How to Use llama.cpp: A Practical First-Day Guide
llama.cpp is the C/C++ inference engine that runs GGUF models on CPU, NVIDIA, AMD, and Apple Silicon hardware. This guide walks a first-day user through picking an install path, grabbing a GGUF model, running it in the terminal, exposing an OpenAI-compatible local API, and fixing the performance footguns everyone hits.
 By Tony Simons 13 min read
Disclosure: This page may contain affiliate links; I may earn a commission at no extra cost to you. It never changes the verdict. Details

Disclosure
I may earn a commission from qualifying purchases. Opinions stay independent. Full disclosure
So you want to run an LLM on your own machine and keep hearing about llama.cpp. Good call. The first thing to know about how to use llama.cpp is how much ground the name covers: llama.cpp is the project, but it’s also the runtime, the build system, the model format, and the HTTP server all at once. The simplest way to put it: it’s a tiny C/C++ engine that runs GGUF-format models on whatever hardware you’ve got – CPU, NVIDIA, AMD, Apple Silicon, even Moore Threads – and ships with a CLI and an OpenAI-compatible HTTP server you can plug into anything.
This guide is a practical first-day path for how to use llama.cpp: pick an install path that fits your machine, grab a GGUF model, run it in the terminal, expose it as a local API, and fix the two documented performance footguns. By the end you should know how to do all five.
Everything below is grounded in the official llama.cpp documentation at github.com/ggml-org/llama.cpp (the project moved from the old ggerganov/llama.cpp location to ggml-org/llama.cpp; same project, same maintainers, current location). Where this guide quotes a flag, command, or claim, the source is the linked page. That’s the ground rule for how to use llama.cpp: when a blog post and the docs disagree, the docs win.
What llama.cpp actually is
llama.cpp is “LLM inference in C/C++” – the README’s own tagline. The project’s goal, in their words, is to enable LLM and VLM inference with minimal setup and state-of-the-art performance on a wide range of hardware, locally and in the cloud.
A few things that make it stand out:
- It’s plain C/C++ with no dependencies. That’s why it compiles cleanly on basically anything.
- Apple silicon is a first-class citizen – ARM NEON, Accelerate, and Metal all in.
- x86 gets AVX, AVX2, AVX512, and AMX support.
- RISC-V gets RVV, ZVFH, ZFH, ZICBOP, and ZIHINTPAUSE support.
- It supports 1.5-bit through 8-bit integer quantization. The whole point is making big models fit on small machines.
- GPU backends include custom CUDA kernels for NVIDIA, HIP for AMD, MUSA for Moore Threads, plus Vulkan and SYCL.
- It can do CPU+GPU hybrid inference, so you can run a model that’s bigger than your VRAM by spilling the rest to RAM.
If you’ve been bouncing between the easy cloud thing and wanting this running locally, llama.cpp is the local-thing side of the equation. For the friendlier wrapper-level view, see this site's guide to running local LLMs; this piece is the layer underneath it. Once you know how to use llama.cpp, the wrappers stop being magic.
Pick your install path
The README’s Quick Start lists four doors:
- Visit llama.app and follow the instructions – the hosted installer.
- Run with Docker – see docs/docker.md.
- Download pre-built binaries from the releases page.
- Build from source – see docs/build.md.
Pick the simplest one that fits your situation:
- Just trying it on a Mac or a laptop → Homebrew on Mac and Linux (
brew install llama.cpp) is the lowest-friction. The Homebrew formula is automatically updated with new llama.cpp releases. - On Windows → Winget (
winget install llama.cpp). It’s also automatically updated. - Wanting a CUDA build on Linux without compiling → conda-forge (
conda install -c conda-forge llama.cpp). They publish CUDA, Vulkan, and Apple Metal flavors. - On Linux and wanting a CUDA build with an exact GPU arch → build from source. The prebuilts don’t know your hardware.
- Wanting a clean reproducible container → Docker. The official images live at ghcr.io/ggml-org/llama.cpp.
- Needing to track a specific release → build from source against a tagged commit.
Don’t overthink the first one. brew install llama.cpp and then llama --version to confirm it landed. If that works, the rest of the guide still applies. And if Homebrew isn’t your situation, the list above already told you your door; that’s the whole install decision when you’re figuring out how to use llama.cpp.
Grab a GGUF model
llama.cpp doesn’t run PyTorch checkpoints directly – it runs GGUF files. GGUF is the binary format the project ships, designed for fast loading, easy parsing, and forward compatibility. It’s a successor to the older GGML, GGMF, and GGJT formats, and the spec lives at github.com/ggml-org/ggml/blob/master/docs/gguf.md.
Practically, that means you want a model whose repo on Hugging Face has files ending in .gguf. You’ll see names like model-Q4_K_M.gguf and model-Q8_0.gguf – those are different quantizations. The naming tells you the trade-off:
- Q4_K_M is the default llama.cpp pulls when you use
-hf– a good 4-bit-per-weight middle ground for most laptops. - Q8_0 is larger but noticeably closer to the unquantized model.
- Q2_K, Q3_K, IQ-series, etc. are for when you really need to squeeze a model into a few GB.
There’s no need to download these by hand when the -hf flag can do it – that’s the next section. After one download, the quant alphabet soup becomes the part of how to use llama.cpp you’ll stop thinking about.
Run a model in the terminal
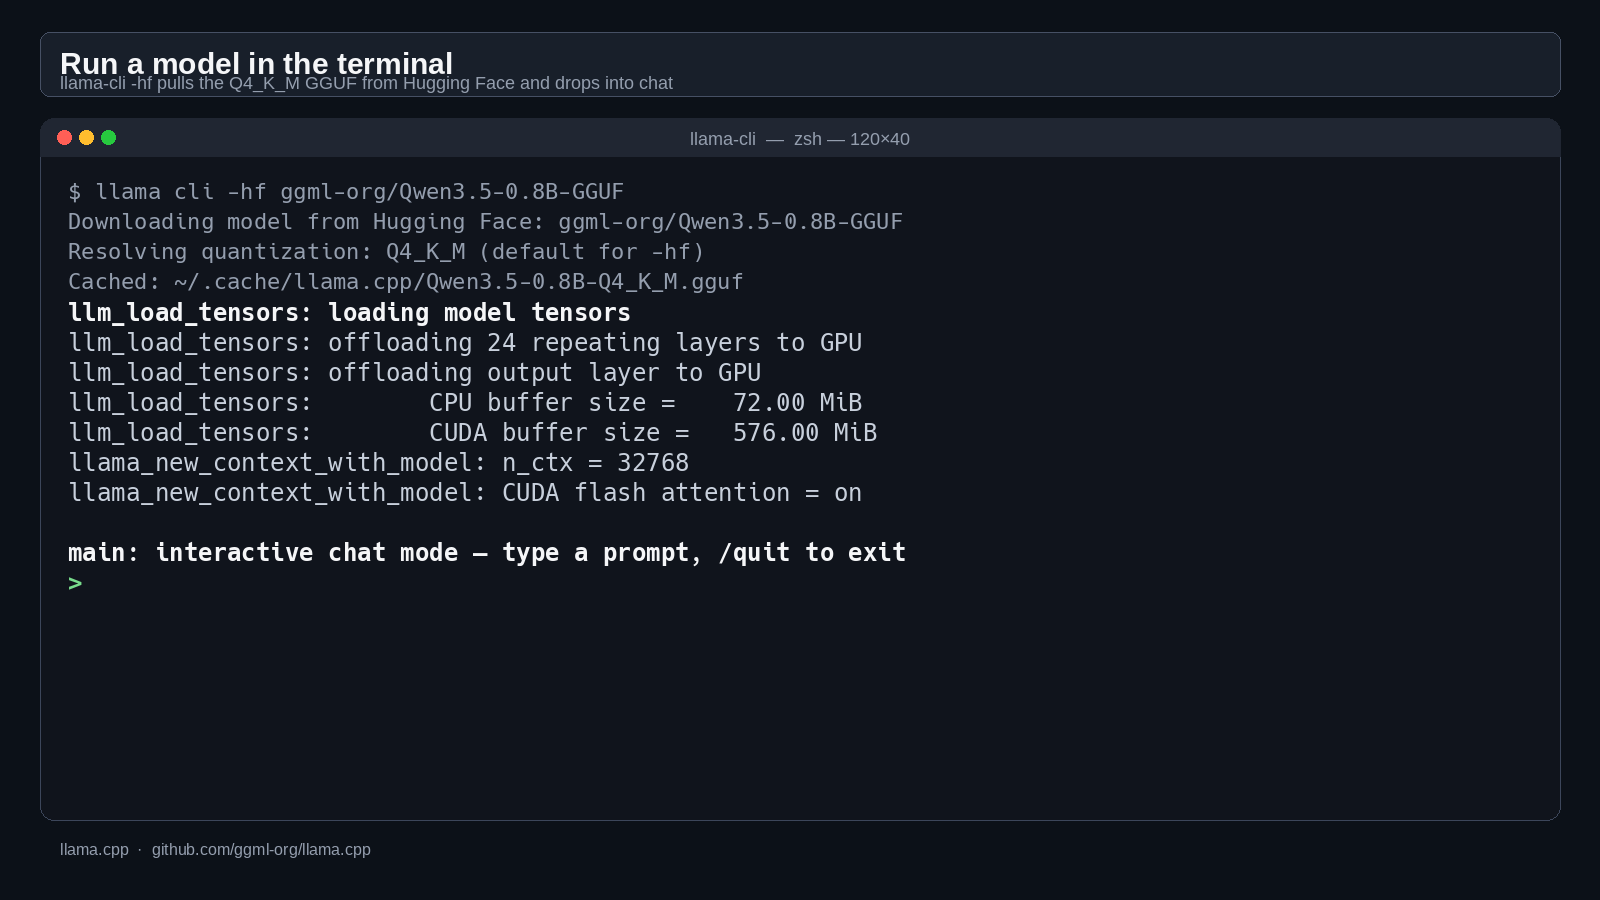
Once llama.cpp is installed, the README’s one-liner is the right starting point:
llama cli -hf ggml-org/Qwen3.5-0.8B-GGUFThat’s it. llama-cli downloads the repo from Hugging Face, picks the Q4_K_M file by default, drops it in the cache, and starts a chat. The mmproj (multimodal projector) file is downloaded automatically if it’s available. To disable that, pass --no-mmproj. To force a specific quantization, append it: -hf owner/name:Q8_0. To force a specific file inside the repo, use -hff file.gguf. To pass a private-repo token, use -hft TOKEN or set HF_TOKEN.
When you already have the GGUF file locally, swap -hf for -m:
llama-cli -m ~/models/Qwen3.5-0.8B-GGUF/Qwen3.5-0.8B-Q4_K_M.ggufThat’s the local-file path, which skips the network and works offline. Either way lands you in an interactive chat. That chat is the ground floor of how to use llama.cpp. Everything past this point is performance tuning or putting it behind an API.
If you’re scripting around it instead of chatting interactively, the common flags you’ll reach for are:
-c, --ctx-size N– how much conversation history fits in the prompt context window. Default is whatever the model was trained for; raise it if you’ve got the VRAM.-n, --predict N– number of tokens to generate. Default is-1(infinity); cap it for batch jobs.-ngl, --n-gpu-layers N– how many transformer layers to offload to the GPU. Accepts a number, the wordauto, orall. This is the one you’ll tune most.-t, --threads N– number of CPU threads used during generation. This is the one that bites people; more on that in the performance section.-fa, --flash-attn on|off|auto– Flash Attention. Defaultauto; turn itoffif you hit an odd bug.-ctk TYPEand-ctv TYPE– KV cache quantization for the K and V tensors. Defaults to f16; you can drop to q8_0 or q4_0 to free VRAM at a small quality cost.-kvo/-nkvo– toggle KV cache offloading.--lora adapter.gguf– load a LoRA adapter on top of the base model.
There’s a lot more in tools/cli/README.md – speculative decoding types (--spec-type), control vectors, RoPE scaling (--rope-scaling, --rope-scale, --yarn-orig-ctx), MoE placement (-cmoe, -ncmoe N), and per-device control (--device, --list-devices) – but you don’t need any of those on day one.
Expose it as a local API
The same build ships llama-server, an OpenAI-compatible HTTP server. README example:
llama serve -hf ggml-org/Qwen3.5-0.8B-GGUFThat gives you a local API on http://localhost:8080 that speaks OpenAI’s chat completions, responses, and embeddings routes – meaning any tool that already speaks OpenAI (Cursor, Cline, Open WebUI, your own scripts) can point at http://localhost:8080/v1 as a drop-in base URL. That base URL is also where an agent stack plugs in; this site's Hermes Agent review shows a workflow that can point at a local endpoint like this one. A local OpenAI-compatible endpoint is the step of how to use llama.cpp that turns a terminal demo into a service.
What the server README documents that matters on day one:
- OpenAI-compatible /v1/chat/completions, /v1/responses, /v1/embeddings, plus Anthropic Messages-compatible chat.
- Parallel decoding with multi-user support and continuous batching, so multiple clients can hit it concurrently without one starving the others.
- Function calling / tool use for “about any model,” with JSON-schema-constrained output.
- A built-in web UI you can hit at the root URL.
- Speculative decoding support (draft model or n-gram based).
- Multimodal support with OpenAI-compatible API.
For server model management specifically:
- POST
/modelsstarts a background download (the body is{"model": "owner/name:Q4_K_M"}). Subscribe to/models/ssefor progress events (download_finishedordownload_failed). Then GET/modelsto refresh the list. - DELETE
/models?model={name}removes a model from cache. Only models stored in cache can be deleted; preset paths can’t.
There’s also a sleep mode worth knowing about if llama-server runs as a long-lived service. Pass --sleep-idle-seconds N and llama-server unloads the model and KV cache from RAM after N seconds of no incoming tasks. The next request reloads it automatically. The exempt endpoints that don’t trigger a reload are /health, /props, /models, and /metrics – they’re free to poll.
Hardware: which backend, which flags
The backend table in the README is the right starting point for the hardware half of how to use llama.cpp:
- CPU – built by default with
cmake -B build && cmake --build build --config Release. - BLAS (CPU linear algebra) –
cmake -B build -DGGML_BLAS=ON -DGGML_BLAS_VENDOR=OpenBLAS. Speeds up prompt processing at high batch sizes; generation speed is unchanged. - Metal (Apple Silicon) – on by default on macOS; disable with
-DGGML_METAL=OFF. Runtime disable:--n-gpu-layers 0. - CUDA (NVIDIA) –
cmake -B build -DGGML_CUDA=ON. Use-DGGML_NATIVE=OFFfor a binary that runs on all CUDA GPUs, or pin specific compute capabilities with-DCMAKE_CUDA_ARCHITECTURES="86;89". - HIP (AMD GPUs) – needs ROCm installed.
- Vulkan – cross-vendor GPU path. Build with
-DGGML_VULKAN=ON. - MUSA (Moore Threads) –
-DGGML_MUSA=ON. - SYCL (Intel GPU) – see docs/backend/SYCL.md.
- WebGPU – for browsers, with Dawn / Emscripten.
You can build with several at once. The canonical example is CUDA plus Vulkan via -DGGML_CUDA=ON -DGGML_VULKAN=ON. At runtime you pick which devices each backend uses with --device dev1,dev2,..., and --list-devices prints what’s actually available. That’s the hardware model of how to use llama.cpp in one line: compile the backends in, choose devices at runtime.
For Docker specifically, the image family is:
ghcr.io/ggml-org/llama.cpp:full– llama-cli + llama-completion + the conversion/quantization tools.:light– llama-cli + llama-completion only.:server– llama-server only.- Plus
-cuda/-cuda13/-rocm/-musa/-intel/-vulkan/-openvino/-s390xvariants.
So a CUDA-backed server in one command is:
docker run --gpus all \
  -v /path/to/models:/models \
  -p 8080:8080 \
  ghcr.io/ggml-org/llama.cpp:server-cuda \
  -m /models/your_model.gguf \
  --port 8080 --host 0.0.0.0 \
  -n 512 --n-gpu-layers 1
Verify the GPU is actually being used
![A labeled terminal figure showing the documented GPU-offload verification flow. The command line is the verbatim perf-doc example: ./llama-cli -m path/to/model.gguf -ngl 200000 -p 'Please sir, may I have some '. The three diagnostic lines from docs/development/token_generation_performance_tips.md are reproduced verbatim in blue: 'llama_model_load_internal: [cublas] offloading 60 layers to GPU', 'llama_model_load_internal: [cublas] offloading output layer to GPU', 'llama_model_load_internal: [cublas] total VRAM used: 17223 MB' (the 17223 MB value is the example GPU memory figure from the perf troubleshooting doc). Footer attribution: llama.cpp · github.com/ggml-org/llama.cpp.](https://www.tonyreviewsthings.com/wp-content/uploads/2026/08/trt-20260823-how-to-use-llama-cpp-inline-gpu-offload-verify.png)
This is the one everybody gets wrong. llama.cpp will happily run a model on the CPU even when you compiled with CUDA and intended to use the GPU. The official performance troubleshooting doc tells you how to confirm.
Run with a deliberately oversized GPU layer count:
./llama-cli -m path/to/model.gguf -ngl 200000Before inference starts, llama.cpp prints diagnostic lines. If the GPU is being used, you’ll see something like:
llama_model_load_internal: [cublas] offloading 60 layers to GPU
llama_model_load_internal: [cublas] offloading output layer to GPU
llama_model_load_internal: [cublas] total VRAM used: 17223 MB
If you don’t see those, the model is on the CPU and your “GPU build” isn’t doing what you think it’s doing. The fixes are usually: rebuild with the right -DGGML_CUDA=ON flag, install matching NVIDIA drivers, or check that the model actually fits in VRAM (use --n-gpu-layers N instead of auto to control layer-by-layer offload). The oversized -ngl trick above is worth running once on every new build; it’s the one-command sanity check at the heart of how to use llama.cpp on a GPU.
Fix the two performance footguns
The performance troubleshooting doc calls out two specific failure modes that account for most of the “why is this so slow” posts:
-nglnot set, or set too low. Even with a CUDA build, llama.cpp defaults toauto, which on some setups keeps more on the CPU than you’d expect. Push it up –-ngl 200000lets llama.cpp offload the maximum possible layers to the GPU.-tset too high. The docs are emphatic about this: if token generation is extremely slow, set-t 1first. If that significantly improves things, your CPU is being oversaturated. Then scale back up: start at 1, double until performance plateaus, and set the final number to your physical core count.
There’s a worked example in the same doc. On an A6000 with 7 physical cores and 32 GB RAM, running a 30B q4_0 model, the benchmark goes from 1.7 tok/s with -t 7 to 9.1 tok/s with -t 4 -ngl 2000000. That’s the kind of improvement you’d otherwise blame on the GPU being broken.
Things that aren’t in the docs but you’ll want
These are pragmatic notes that aren’t load-bearing claims – none of them are sourced from official docs – but they’re useful when you’re wiring llama.cpp into a real workflow.
- Treat the cache like a cache. When
-hfdownloads a model, it lives in your llama.cpp cache directory. SetLLAMA_ARG_CACHE_TYPE_K/LLAMA_ARG_CACHE_TYPE_V(or the-ctk/-ctvflags) to q8_0 if you’re tight on VRAM and want to keep a long context. - The
--fitfamily of flags (--fit on|off,--fit-target MiB,--fit-ctx N) auto-shrinks unset arguments to fit your device memory. Default ison. Useful when you don’t want to hand-tune--n-gpu-layersfor every new model. - For NUMA boxes,
--numa distribute|isolate|numactlcontrols how threads are placed. The doc warns: drop your system page cache before usingnumactl. - If you want offline-only operation, pass
--offline. It forces the cache and blocks network access.
When to reach for what
A few shortcuts on how to use llama.cpp, drawn from the official docs:
- For chatting with a model from your own terminal:
llama-cli -m model.gguforllama-cli -hf owner/name. - For a local OpenAI-compatible API:
llama-server -m model.gguf --port 8080 --host 0.0.0.0. Hit it from anything that already speaks OpenAI. - For a clean reproducible container:
docker run --gpus all -v ... ghcr.io/ggml-org/llama.cpp:server-cuda .... - For low-end laptops: pick Q4_K_M, keep
-nglmodest or0, and use KV cache quantization (-ctk q8_0 -ctv q8_0) to leave room for context. - For an Apple Silicon laptop: don’t compile anything.
brew install llama.cppis Metal-on by default. Use--n-gpu-layersto control how much goes to GPU vs unified memory.
Everything above is the short version of how to use llama.cpp; the long version is this page plus the docs it links to.
What’s next: how to use llama.cpp beyond day one
If you want to go deeper:
- The function-calling guide at docs/function-calling.md walks through tool use and JSON-schema-constrained output.
- docs/multimodal.md covers multimodal / vision-language models and the matching OpenAI-compatible endpoints.
- docs/multi-gpu.md covers splitting a single model across multiple GPUs (
--split-mode layer|row|tensor,--tensor-split N0,N1,N2,...,--main-gpu). - docs/development/token_generation_performance_tips.md is the place to start when something is slow.
- docs/ops.md lists the underlying ggml ops if you want to understand what the kernels are doing.
llama.cpp is the kind of project where the README is the manual and the docs/ directory is the deep reference. You don’t need to read all of it before you start. You now know how to use llama.cpp: installed, running, verified on the right hardware, and either serving it or scripting it. Install it, run llama-cli -hf ggml-org/Qwen3.5-0.8B-GGUF, watch it resolve the Q4_K_M quantization and drop into the interactive chat prompt, and decide from there how much of the rest of the system you actually need.
Reviewed & written by
Tony Simons
Tony has a bachelor's degree from the University of Phoenix and over 14 years of writing experience between multiple publications in the tech, photography, lifestyle, and deal industries.


